> ## Documentation Index
> Fetch the complete documentation index at: https://docs.nomadicml.com/llms.txt
> Use this file to discover all available pages before exploring further.
# SDK Installation
> Install and configure the Nomadic SDK
# Installing the Nomadic SDK
This guide covers the installation and basic configuration of the Nomadic Python SDK.
## Prerequisites
* Python 3.8–3.11
* pip (Python package installer)
Ensure that you have the latest up to date version to avoid potential issues during installation.
## Installation Steps
### 1. Standard Installation
Install the SDK directly from [PyPI](https://pypi.org/project/nomadicml/):
```bash theme={null}
pip install nomadic
```
This is the recommended method for most users.
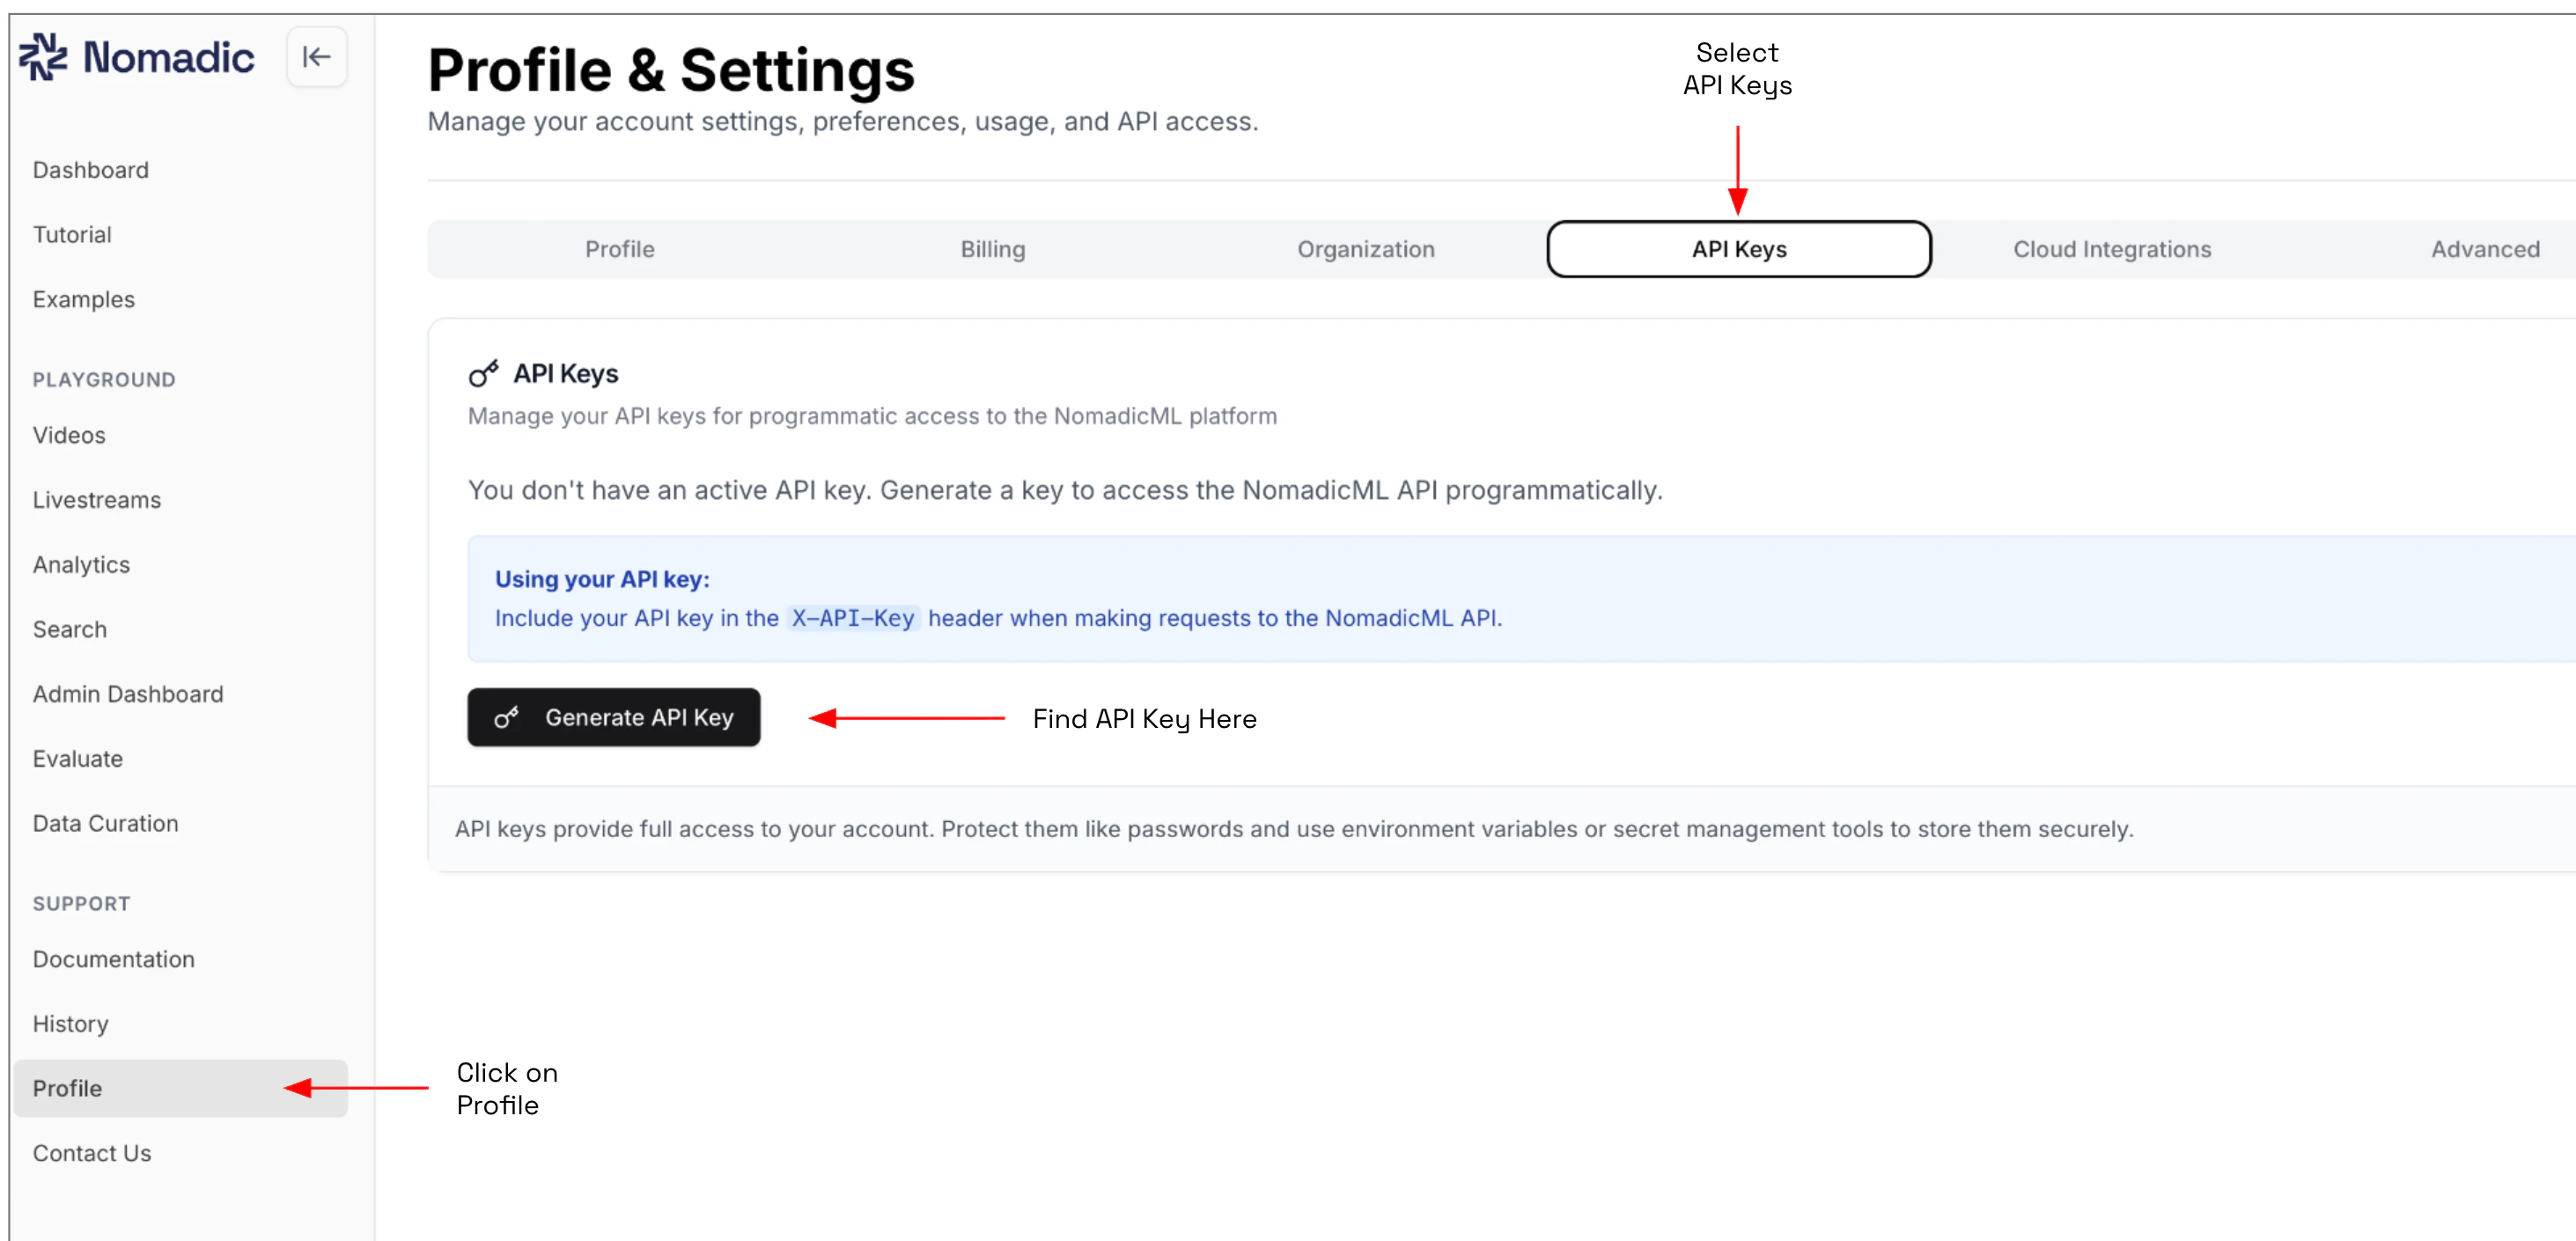
### 2. Obtain your API Key
Get your API key first. Log in to [app.nomadicml.com](https://app.nomadicml.com).
Go to **Profile → API Keys**, and click **Generate New Key**.
The full key is shown only once — copy it immediately.
 ### 3. Basic Configuration
Once you have the SDK installed and your API key, you can initialize the client:
```python theme={null}
import os
from nomadic import NomadicAI
client = NomadicAI(api_key=os.environ["NOMADICAI_API_KEY"])
# Or with custom configuration for self-hosted deployments
client = NomadicAI(
api_key=os.environ["NOMADICAI_API_KEY"],
base_url="https://custom-deployment.example.com", # Optional: defaults to https://api-prod.nomadicml.com/
timeout=60, # Optional: Custom timeout in seconds
collection_name="custom_collection" # Optional: Firestore collection name for your private instance — provided by your Nomadic admin
)
```
If you are running a self-hosted VPC deployment of Nomadic, set `collection_name` to the Firestore collection provided by your Nomadic admin. If you are using the standard cloud version of Nomadic, leave `collection_name` out.
### 4. Verifying Installation
To verify that everything is set up correctly:
```python theme={null}
import os
from nomadic import NomadicAI
client = NomadicAI(api_key=os.environ["NOMADICAI_API_KEY"])
try:
auth_info = client.verify_auth()
print("Authentication successful:", auth_info)
except Exception as e:
print("Authentication failed:", e)
```
## Troubleshooting
**`AuthenticationError: Invalid API key`**
If your API key is missing, incorrect, or expired, double-check that:
* You copied the full key (it's only shown once at generation)
* The key hasn't expired — check the expiry date in **Profile → API Keys**
* Your environment variable is set correctly: `echo $NOMADICAI_API_KEY`
For other authentication issues, see the [Authentication Guide](/advanced/authentication).
For package conflicts, try installing in a virtual environment or upgrading to the latest version with `pip install --upgrade nomadic`.
## Next Steps
Now that you have the SDK installed and configured, you can:
Deploy and manage Nomadic within your own Virtual Private Cloud.
Get started quickly with the Nomadic tool.
### 3. Basic Configuration
Once you have the SDK installed and your API key, you can initialize the client:
```python theme={null}
import os
from nomadic import NomadicAI
client = NomadicAI(api_key=os.environ["NOMADICAI_API_KEY"])
# Or with custom configuration for self-hosted deployments
client = NomadicAI(
api_key=os.environ["NOMADICAI_API_KEY"],
base_url="https://custom-deployment.example.com", # Optional: defaults to https://api-prod.nomadicml.com/
timeout=60, # Optional: Custom timeout in seconds
collection_name="custom_collection" # Optional: Firestore collection name for your private instance — provided by your Nomadic admin
)
```
If you are running a self-hosted VPC deployment of Nomadic, set `collection_name` to the Firestore collection provided by your Nomadic admin. If you are using the standard cloud version of Nomadic, leave `collection_name` out.
### 4. Verifying Installation
To verify that everything is set up correctly:
```python theme={null}
import os
from nomadic import NomadicAI
client = NomadicAI(api_key=os.environ["NOMADICAI_API_KEY"])
try:
auth_info = client.verify_auth()
print("Authentication successful:", auth_info)
except Exception as e:
print("Authentication failed:", e)
```
## Troubleshooting
**`AuthenticationError: Invalid API key`**
If your API key is missing, incorrect, or expired, double-check that:
* You copied the full key (it's only shown once at generation)
* The key hasn't expired — check the expiry date in **Profile → API Keys**
* Your environment variable is set correctly: `echo $NOMADICAI_API_KEY`
For other authentication issues, see the [Authentication Guide](/advanced/authentication).
For package conflicts, try installing in a virtual environment or upgrading to the latest version with `pip install --upgrade nomadic`.
## Next Steps
Now that you have the SDK installed and configured, you can:
Deploy and manage Nomadic within your own Virtual Private Cloud.
Get started quickly with the Nomadic tool.